
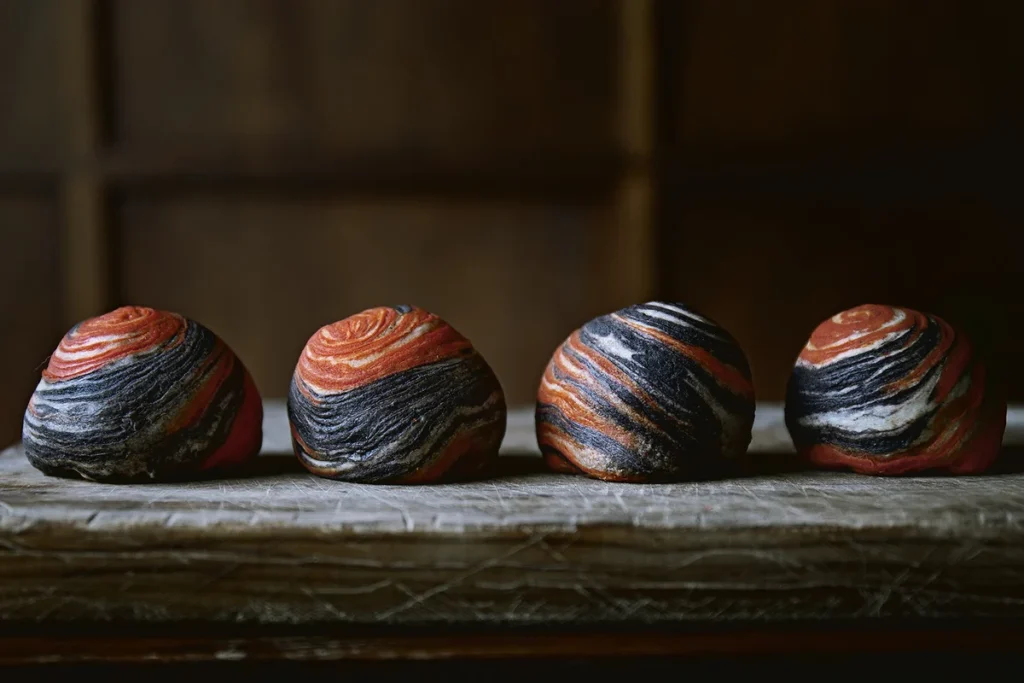
The doorbell rang at 6 pm on a Friday in October, and there it was again — a box of pastries from a bakery I’d been passing for years. This time I couldn’t hide behind a polite smile and walk past. I’d finally found the trick to getting people to try something they can’t name: dress it up in Halloween colours.
For years, I’d been keeping a pastry I love quietly to myself. We are creatures of habit and comfort, after all, and most of us were properly raised not to speak to strangers. Trying a pastry with no English name, made with a root vegetable most people can’t identify, felt like it would run into a wall of polite rejections. So I hid it. An excuse? Maybe. But hiding it kept it safe, and it kept me coming back for more.
That pastry is Yutou Su, a Taiwanese laminated dough. Yutou is taro. Su is an umbrella word for a family of flaky, crumbly pastries, and here it means the dough itself. It takes a minute to say, but the moment you take a bite you understand why the word exists: wafer-thin layers, fantastically delicate, leaning on one another like the wings of a bee. Flaky yet soft. Almost gentle enough to fold like a single-ply tissue, and hold together just as firmly. The mildly sweet, smooth-as-butter taro inside wraps the whole thing in what I can only describe as a motherly embrace.
I kept hoping a croissant comparison would bridge the gap. It won’t. Yutou Su is neither — and that’s the point.
Why this dish
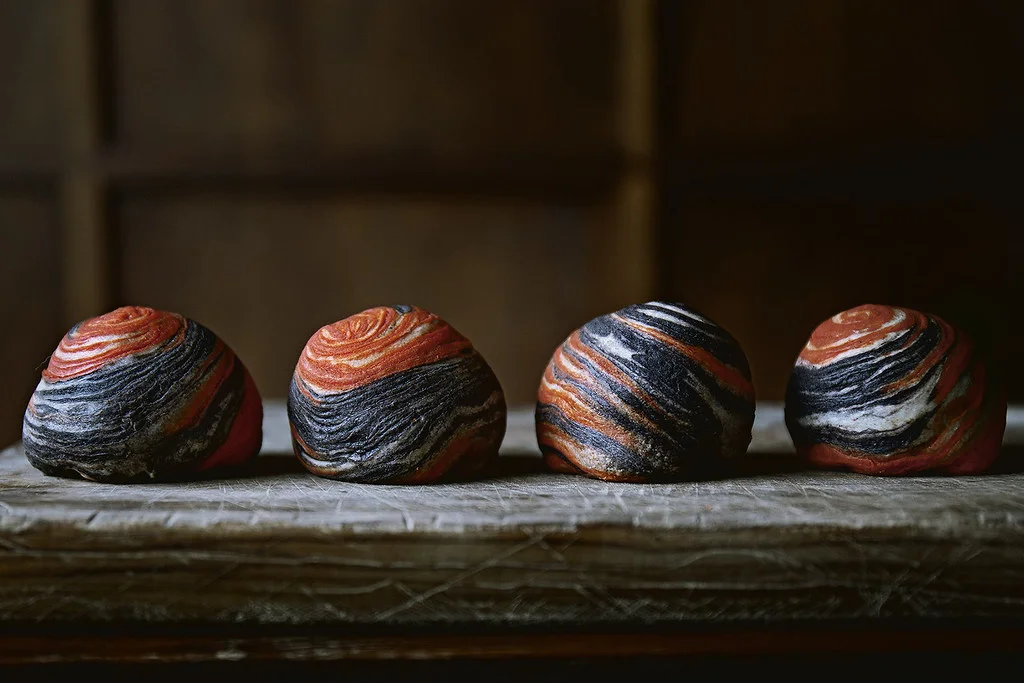
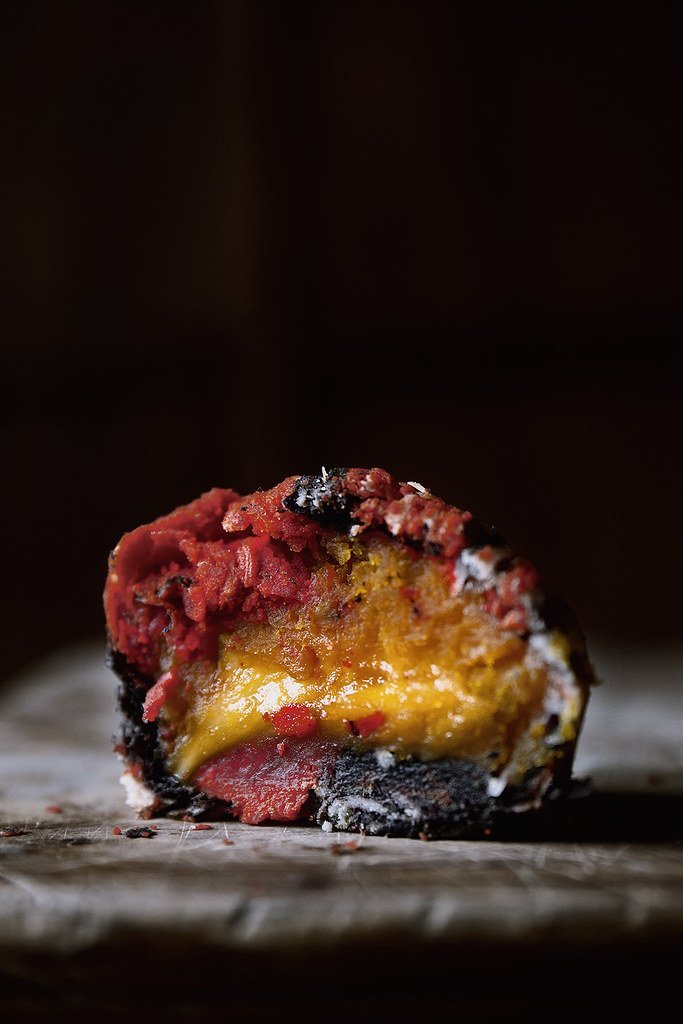
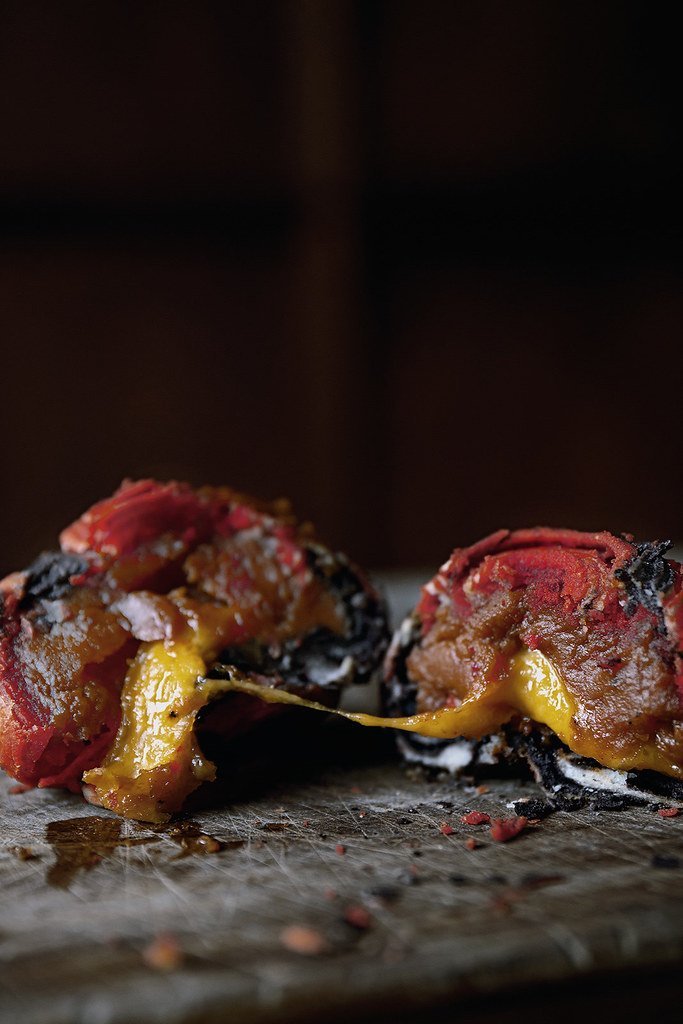
Today I’m not making the original. I dressed Yutou Su up for America’s most highly participated holiday: a swirling tornado of spooky black and dark orange, with a smooth pumpkin paste filling and a centre of gooey melted cheddar thrown in for good measure.
It works. Sweet pumpkin has clearly been waiting for the sharpness of cheddar, and the loud costume never talks over the delicate pastry. It’s different from the original, to say the least — and a lot more fun.
Ingredients
Yield: 12 pastries. Technique adapted from Qiong Cooking.
- 1 Japanese/Korean Kent pumpkin, or 2 cans pumpkin puree (see note below)
- 12 bite-size cubes of American cheddar cheese
- Water dough (strongly recommend measuring by weight): 1¼ cup minus 1 tbsp (150 g) all-purpose flour, 4 tbsp (55 g) lard — it yields a better result — or unsalted butter, 2 tbsp (30 g) granulated sugar, ⅛ tsp fine sea salt, ¼ cup (60 g) water
- Fat/oil dough (strongly recommend measuring by weight): ¾ cup (96 g) all-purpose flour, 4 tbsp (55 g) lard or unsalted butter
- Black and orange food dye, natural or artificial, powder or liquid (see note below)
5 simple steps
1. Start the day before (up to 3 days ahead)
Make the filling and the water dough the day ahead, or up to 3 days before serving.
For fresh pumpkin, choose a low-moisture variety such as Japanese/Korean Kent — the small ones with very sweet, flavorful flesh. Peel, seed, and cut into ½-inch pieces. Scatter on a baking rack and bake at 270 F/130 C fan-on, or 300 F/150 C no-fan, for about 1 to 1½ hours, until the pieces have lost about half their original volume and look shrivelled. Blend until smooth with an immersion blender or food processor, and sweeten with light brown sugar to your liking. It should be very thick, more paste-like than puree.
For canned puree, spread it evenly on a baking sheet and bake at the same temperature for about 1 hour, until it has lost half its volume. Blend until smooth and sweeten as needed. Refrigerate until you’re ready to use it.
2. Make the water dough
At least one day ahead, knead the water-dough ingredients for about 5 minutes until supple, soft and smooth. Wrap in plastic wrap and refrigerate overnight, or up to 3 days, to let the gluten develop further. You can use it straight from the fridge.
3. Portion the filling (day of serving)
With an ice-cream scoop about 3 tbsp in total volume, make a scoop of pumpkin paste and press a bite-size cube of cheddar into the middle. Level the top, release onto a parchment-lined baking sheet, and repeat until you have 12 scoops. Pop them in the freezer to harden slightly — but don’t let them fully freeze, since cheese doesn’t freeze well.
4. Build the laminated spirals
Knead the fat/oil dough until smooth, divide it into 2 equal portions, and colour one black and one orange. Add dye a little at a time until you reach the shade you want. Roll each portion into a log, divide each log into 12 equal pieces, and shape them into little tubular nubs. That’s 12 black nubs and 12 orange nubs. Set aside.
Take the chilled water dough, divide it into 6 equal portions, and shape each into a ball. Keep them in the exact order you handle them, covered loosely with plastic wrap.
Roll the first ball into a 3×4 inch (8×10 cm) oval. Place one black tube, one orange, one black, one orange, side by side in the centre. Wrap the dough around them and pinch the seams tight. Gently flatten, and put it back in its place in the line. Repeat with all 6 balls.
Now go back to the first ball, turn it so the coloured dough runs perpendicular to you, and roll it into a long oval exactly 1 foot/30 cm — no longer, or you’ll lose the layers. Trim any excess dough at the ends, then roll from one end into a little cigar. Back in line. Repeat until all 6 are done.
Turn the first cigar perpendicular and roll it out into a 1-foot/30 cm oval again. Fold it lengthwise into a skinny strip, then gently roll it just to enclose the fold. If the strip runs a little longer than 1 foot/30 cm, that’s fine — no more than 1 inch/3 cm. Trim the ends, roll it from one end into a tight snail, and put it back where it belongs. Repeat until all 6 are done.
Slice the first snail right down the middle into two equal disks. Place it cut-side down and roll it into a 4 inch/10 cm circle, keeping the spiral’s centre in the middle. Nestle a filling — straight from the freezer is fine — in the centre with the round side facing down, bring the dough together and pinch to enclose. Set on a parchment-lined sheet and repeat until you’ve made all 12.
5. Bake
Preheat the oven to 340 F/170 C, keeping the pastries in the fridge meanwhile. Bake on the lowest rack, to prevent top browning, for 25 minutes. Let them cool on a rack for 15 minutes before serving.
Make it your own
- If you want the filling orange, stick with a low-moisture pumpkin like Japanese/Korean. If colour doesn’t matter, chestnut, taro, or lentil puree work as fillings too.
- Lard gives the best flake, but unsalted butter works fine if you’d rather.
- Keep the pastries in the fridge while the oven heats — it keeps the layers crisp.
- They’re at their best on Halloween, but nobody will mind if one turns up in February.
Start today
- ✓ Pick up a Kent pumpkin or two cans of puree on your next grocery run
- ✓ Set aside a 15-minute slot this week to make the filling — it keeps 3 days in the fridge
- ✓ Print or bookmark the shaping steps; the dough is forgiving, the sequence is not
It’s a pastry that needed a costume to be invited into a kitchen. This year, it gets in without one.
Today’s tiny step: This week, make the filling and let it rest in the fridge. The swirl can wait until Halloween — and honestly, so can you.
— E, your habit neighbor